Ditch Sentry for a free open-source alternative

Table of Contents
- What is GlitchTip
- Installing GlitchTip
- Using GlitchTip
- Replacing Sentry on your existing application
1. What is GlitchTip
GlitchTip is an open-source alternative for the Sentry error tracking platform. This was created after the Sentry team decided to re-license Sentry and stop using Apache-2.0, MIT, and BSD 3-Clause across hundreds of repositories.
GlitchTip collects errors reported by your app and puts them all in one place for you to see. It can use Sentry’s open source SDKs to receive error data from your application.

The main advantage that GlitchTip offers is an alternative backend to handle your errors. You will continue to use the SentrySDK, soo it’s necessary to update the SentryDSN in your applications.
2. Installing GlitchTip
You can basically run this software anywhere. Here I decided to deploy it inside an AWS EC2 Instance with Docker and Docker-Compose.
When running in a self-hosted environment you don’t have to worry about paying anything or even reaching your monthly limit (because there aren’t any limits).
The first step into getting your server working is to install docker+docker-compose
Follow the official docker documentation for your OS here.
Follow the official docker-compose documentation here.
After installed both software installed, it’s time to configure your settings, copy the following docker-compose.yml
configuration file to your server and edit the header parameters to match your preferences.
version: "3.4"
x-environment: &default-environment
    DATABASE_URL: postgres://postgres:postgres@postgres:5432/postgres
    SECRET_KEY: your-secret-here
    PORT: 8000
    GLITCHTIP_DOMAIN: https://glitchtip.yourcompany.com
    EMAIL_URL: smtp+tls://smtp-user:smtp-password@email-smtp.eu-west-1.amazonaws.com:587
    DEFAULT_FROM_EMAIL: glitchtip@yourcompany.com
    ENABLE_OPEN_USER_REGISTRATION: "True"
x-depends_on: &default-depends_on
    - postgres
    - redis

services:
    postgres:
        image: postgres:12
        environment:
            POSTGRES_HOST_AUTH_METHOD: "trust"
        restart: unless-stopped
        volumes:
            # This will save the PostgreSQL data in your current folder
            - ./postgres-data:/var/lib/postgresql/data
    redis:
        image: redis
        restart: unless-stopped
    web:
        image: glitchtip/glitchtip:latest
        depends_on: *default-depends_on
        ports:
            - "8000:8000"
        environment: *default-environment
        restart: unless-stopped
    worker:
        image: glitchtip/glitchtip:latest
        command: celery -A glitchtip worker -B -l INFO
        depends_on: *default-depends_on
        environment: *default-environment
        restart: unless-stopped
    migrate:
        image: glitchtip/glitchtip:latest
        depends_on: *default-depends_on
        command: "./manage.py migrate"
        environment: *default-environment
This configuration will create a simple GlitchTip server with a
PostgreSQL database and will save the database files in the same path as your docker-compose.yml file under the name
postgres-data/.
To start your server just run this command:
docker-compose up -d
3. Using GlitchTip
After booting the server for the first time, it will automatically populate the database for you. Then you just need to setup your account.
Open the domain name you have assigned to it, or the server address with the port 8000, like this http://127.0.0.1:8000
and click Sign Up.
After the registration process, you will be automatically Logged-in and receive an email to confirm your account (if you have set up the SMTP configuration).
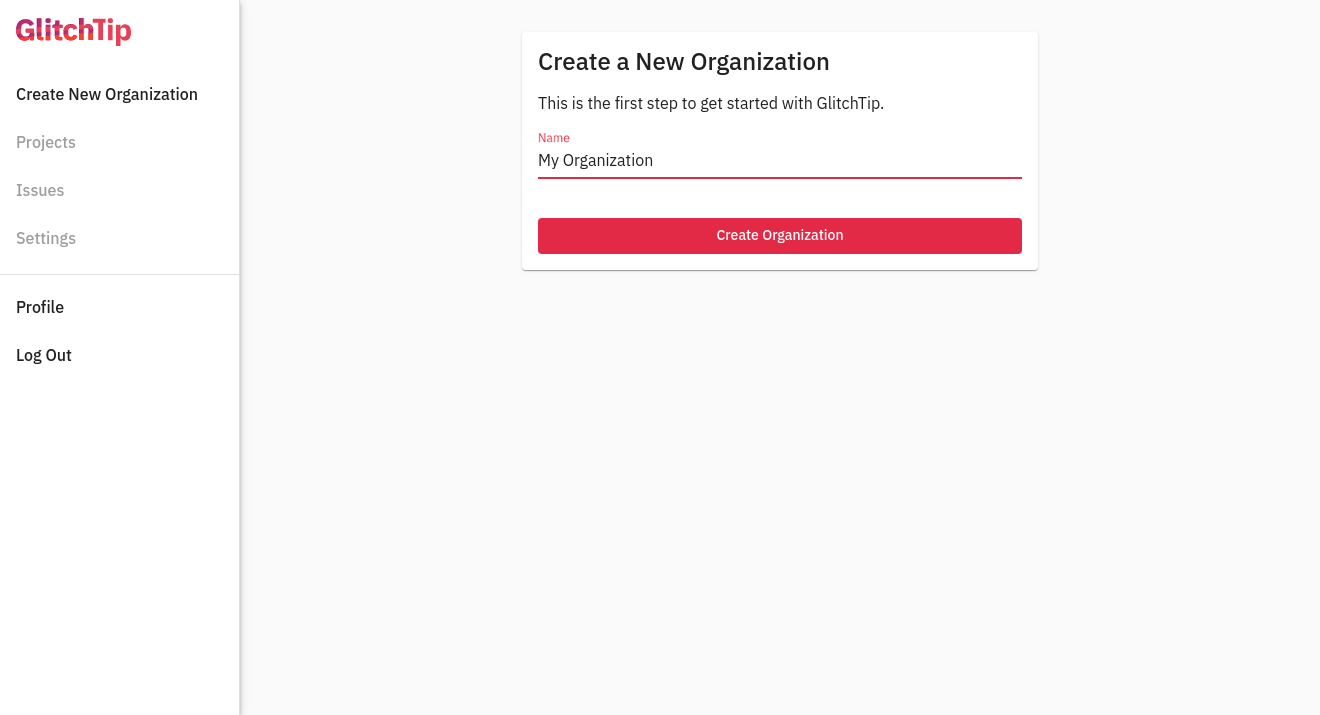
The first screen that appears is to create an organization. An organization in GlitchTip works just like an organization in Sentry, it helps to coordinate all your projects and invite team members to visualize the issues in them.
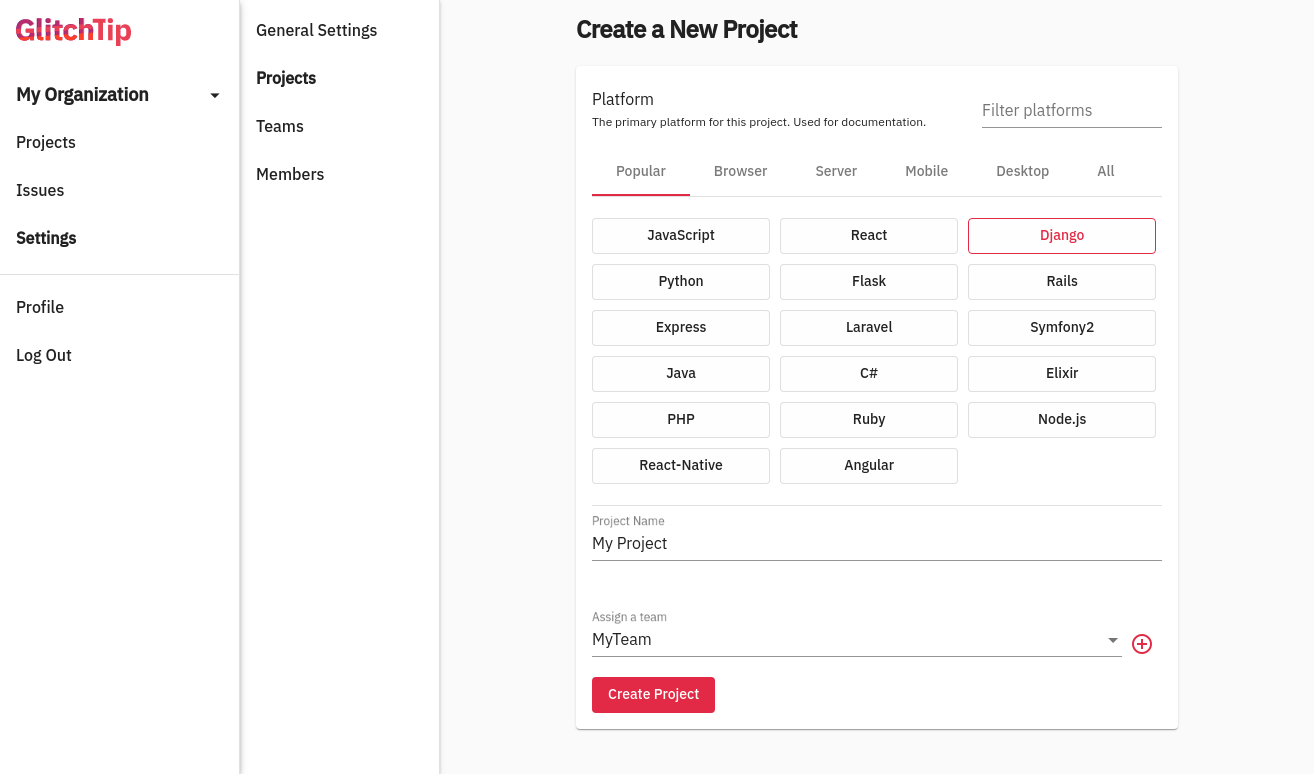
Creating a project in GlitchTipSubsequently, click create a project and you will see a page similar to what you find on Sentry to set up your project. In this case, I’m going to use Django for the next steps.
You can also subdivide your project into teams (that works like permission groups) and then assign members and projects to them.
4. Replacing Sentry on your existing application
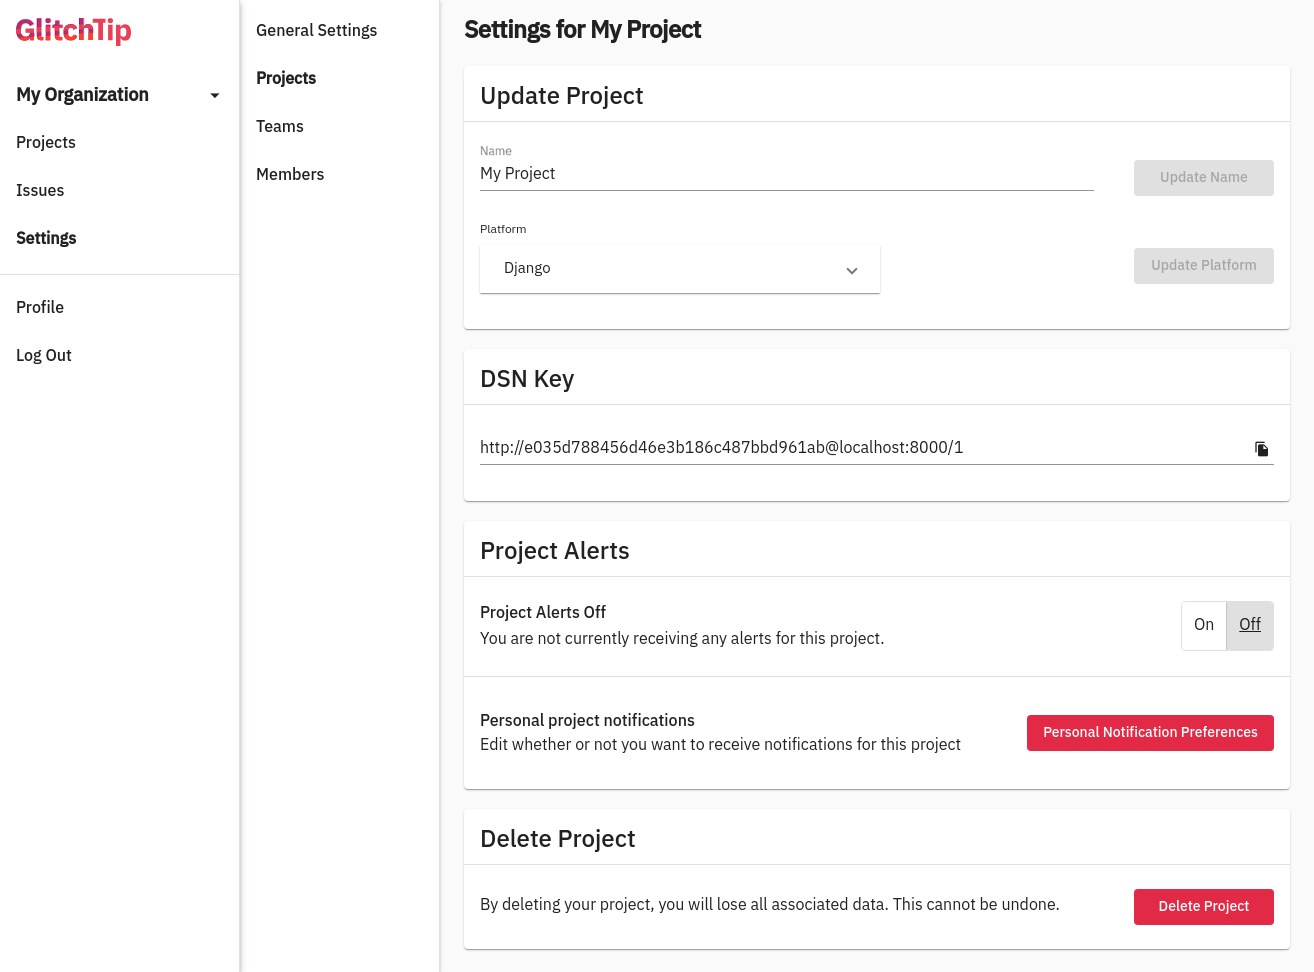
Project setting in GlitchTipWhen creating a project you will be redirected to the project settings, where you can add teams and members to work collaborate. You will also find the DSN Key that looks just like the Sentry one.
In this case, the DSN Key says localhost, that’s because I hadn’t set up the Domain name in the docker-compose configuration. Soo, if you do the same, make sure it points to the right server address.
Then, all you need to do is to replace your Sentry DSN key in your existing application.
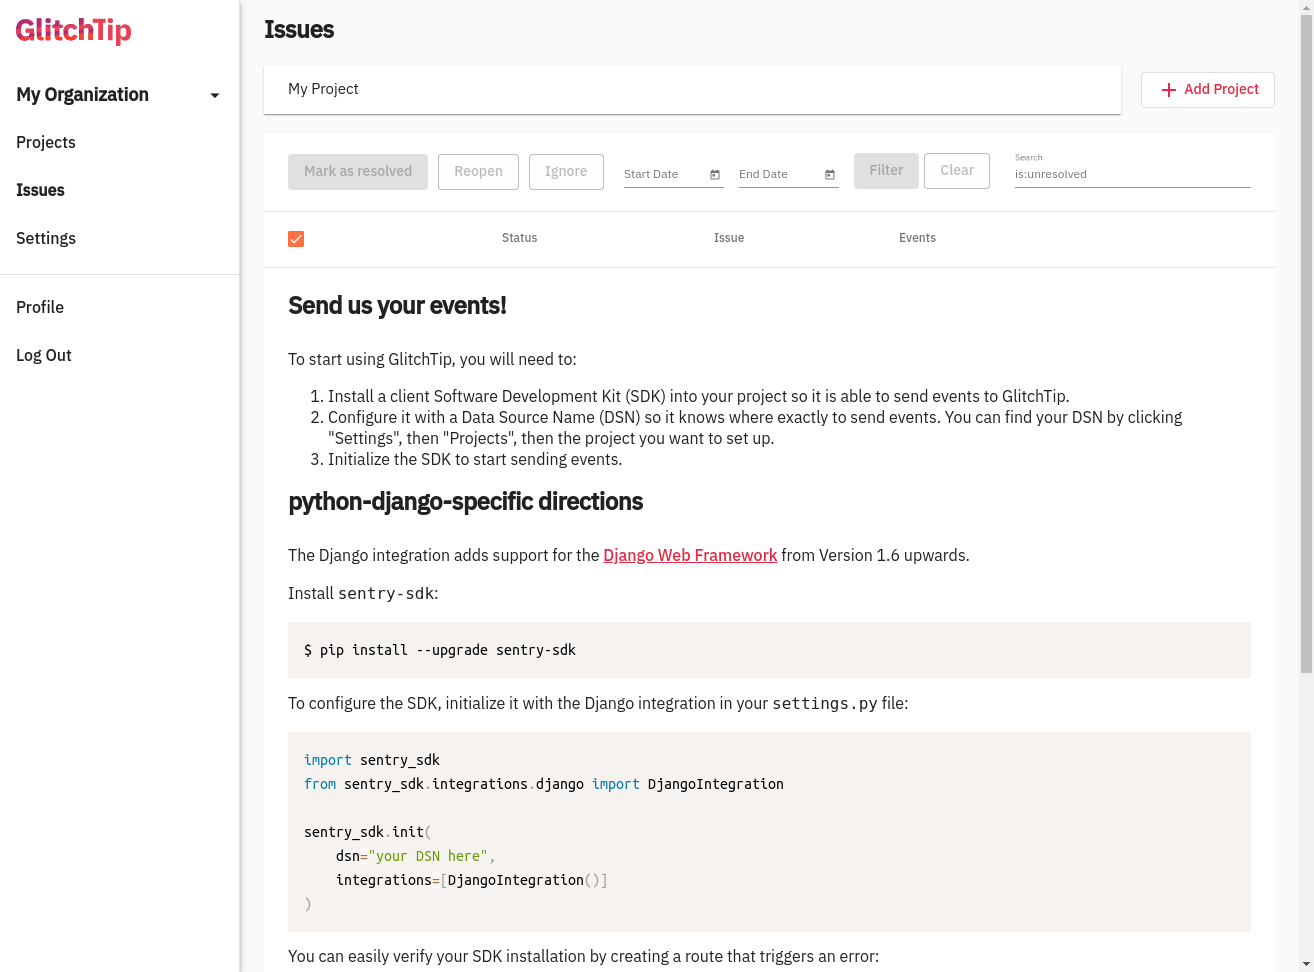
Issues list page in GlitchTipIf you click on the issues tab, you can filter it by project and other parameters. Here you will also see a small tutorial on how to setup GlitchTip for the platform you have chosen.
Sources: