Django Meets Cloudflare D1: Integration and Setup

Integrating a reliable database with your Django application just got easier with Cloudflare D1. In this guide, i will walk you through the steps to connect your Django app to Cloudflare’s managed D1 database. By the end, you’ll have a robust and scalable backend ready to go.
Table of Contents
- Creating a new Django project
- Creating a D1 database
- Creating a Cloudflare API token
- Updating the project settings
- Final Result
1. Creating a new Django project
First, install dependencies with the following commands.
pip install django django-cf
Create a blank project using the django-admin cli
django-admin startproject mysite
cd mysite
Now running python manage.py runserver should open a local server of Django in your computer.
2. Creating a D1 database
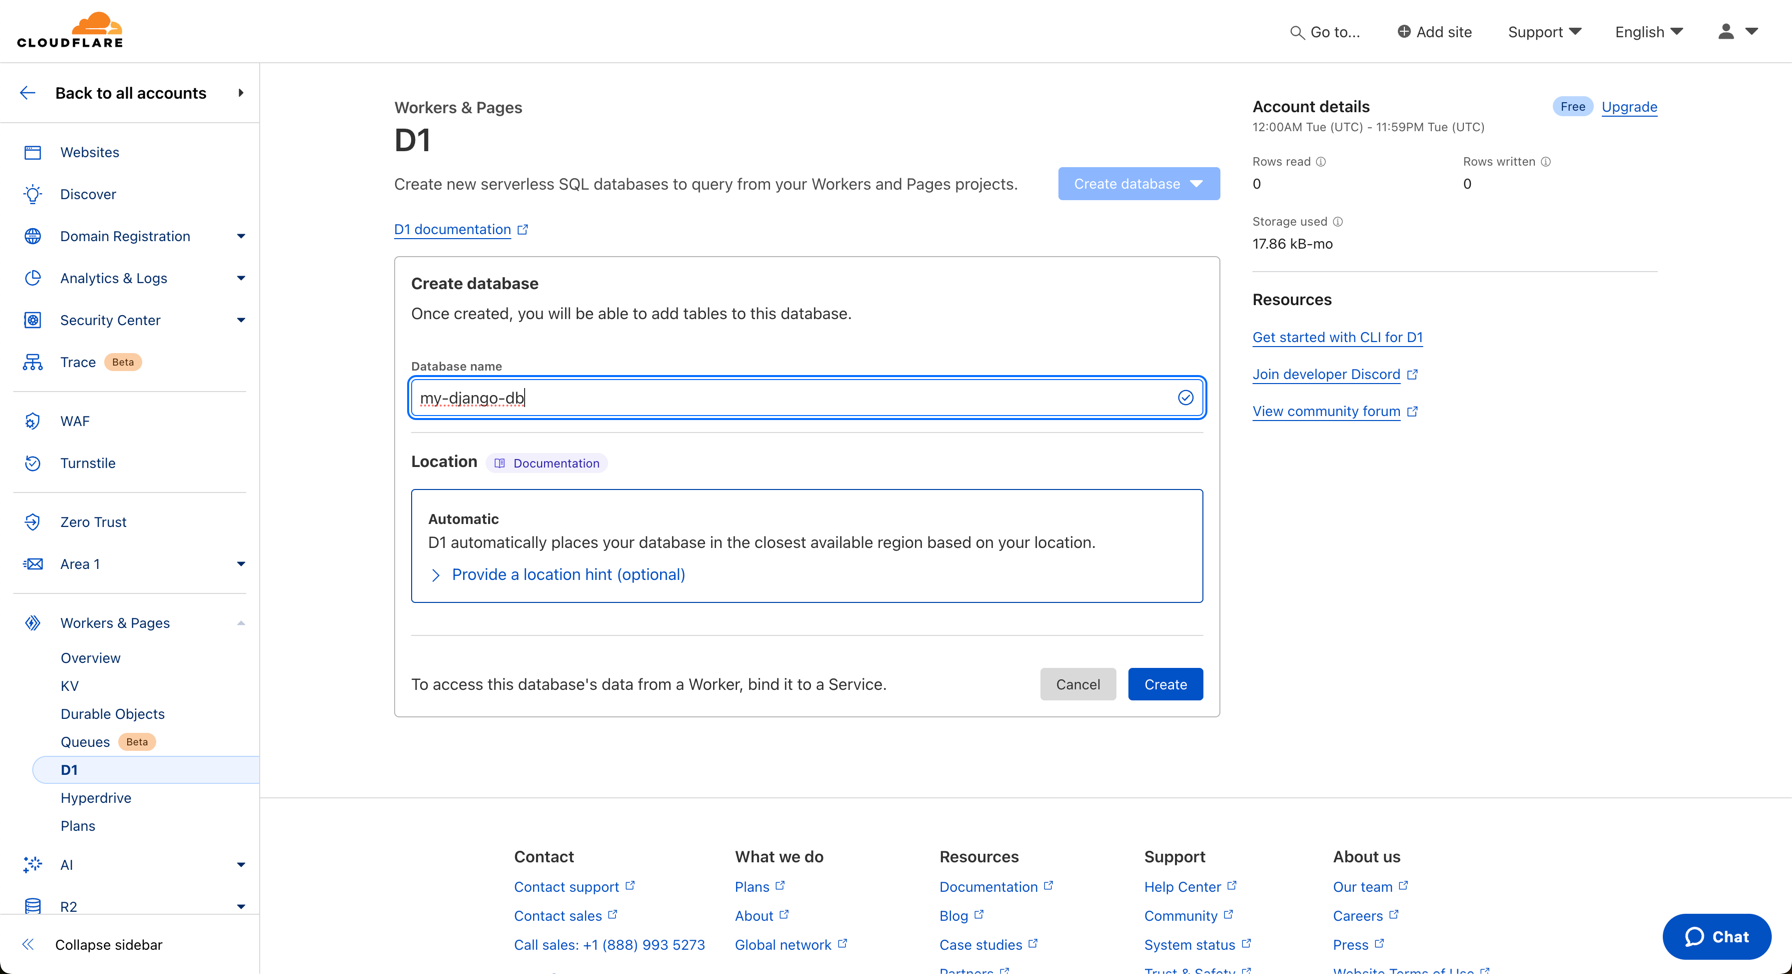
Assuming you already have a Cloudflare account, open the Cloudflare Dash and go to the D1 section under “Workers and Pages”.
Then click “Create database” followed by “Dashboard”, on this screen put your desired database name and click “Create”.
After clicking the “Create” button you will be redirected to the database details page, from this page copy and save the Database ID, you will need it later on.
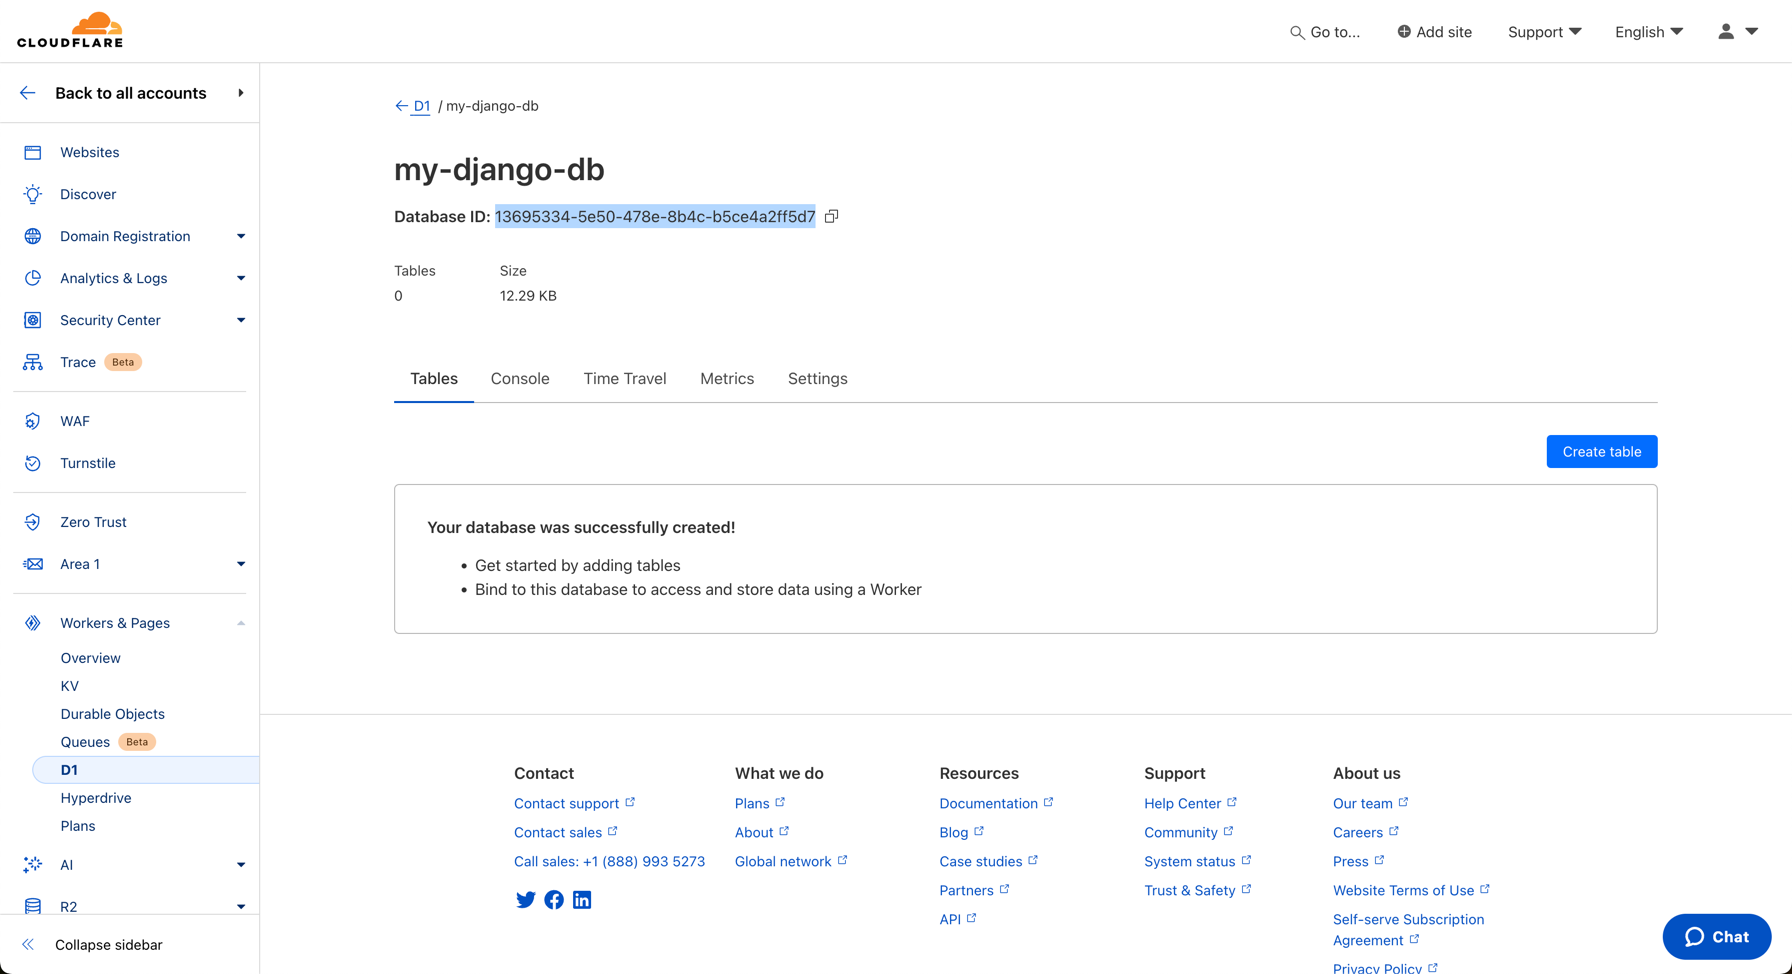
Save your Cloudflare account id, by taking the first id in your current url:
For example in my address bar this is my current url:
https://dash.cloudflare.com/990f15881883466384bfb1553f09096a/workers/d1/databases/13695334-5e50-478e-8b4c-b5ce4a2ff5d7
So the first id present in my url and the account id is 990f15881883466384bfb1553f09096a.
3. Creating a Cloudflare API token
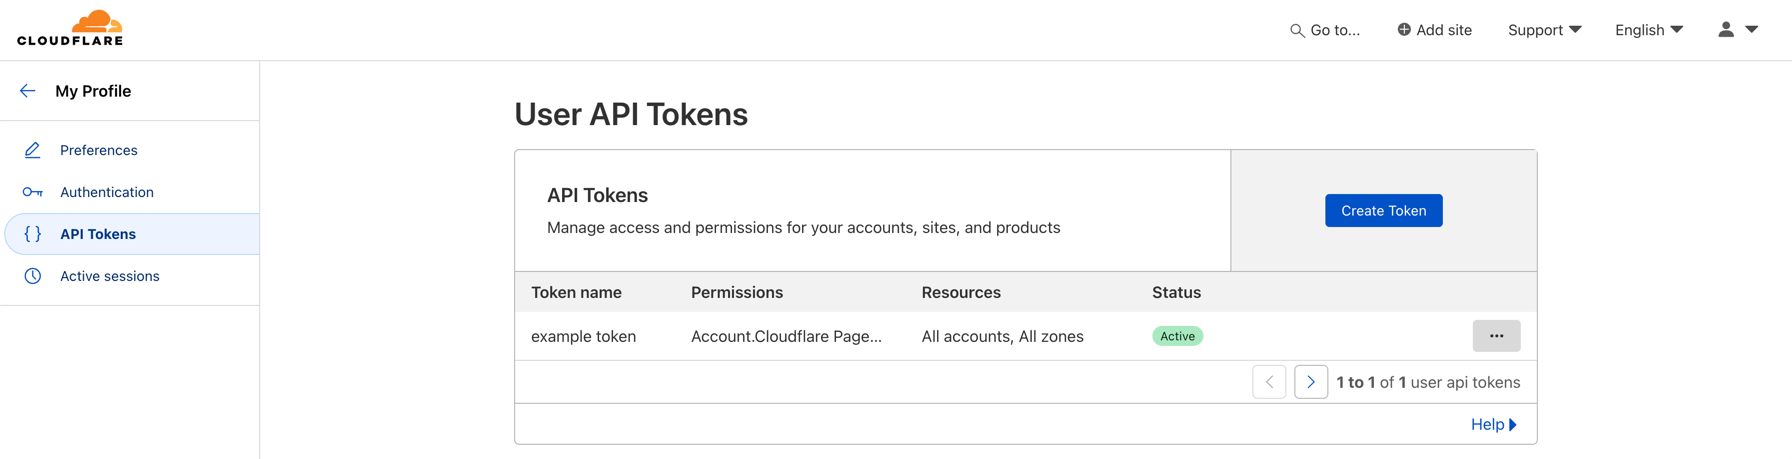
On the top-right conner of the dashboard, click the user icon and then “My Profile”.
Then Click “API Tokens” and finally “Create Token”.
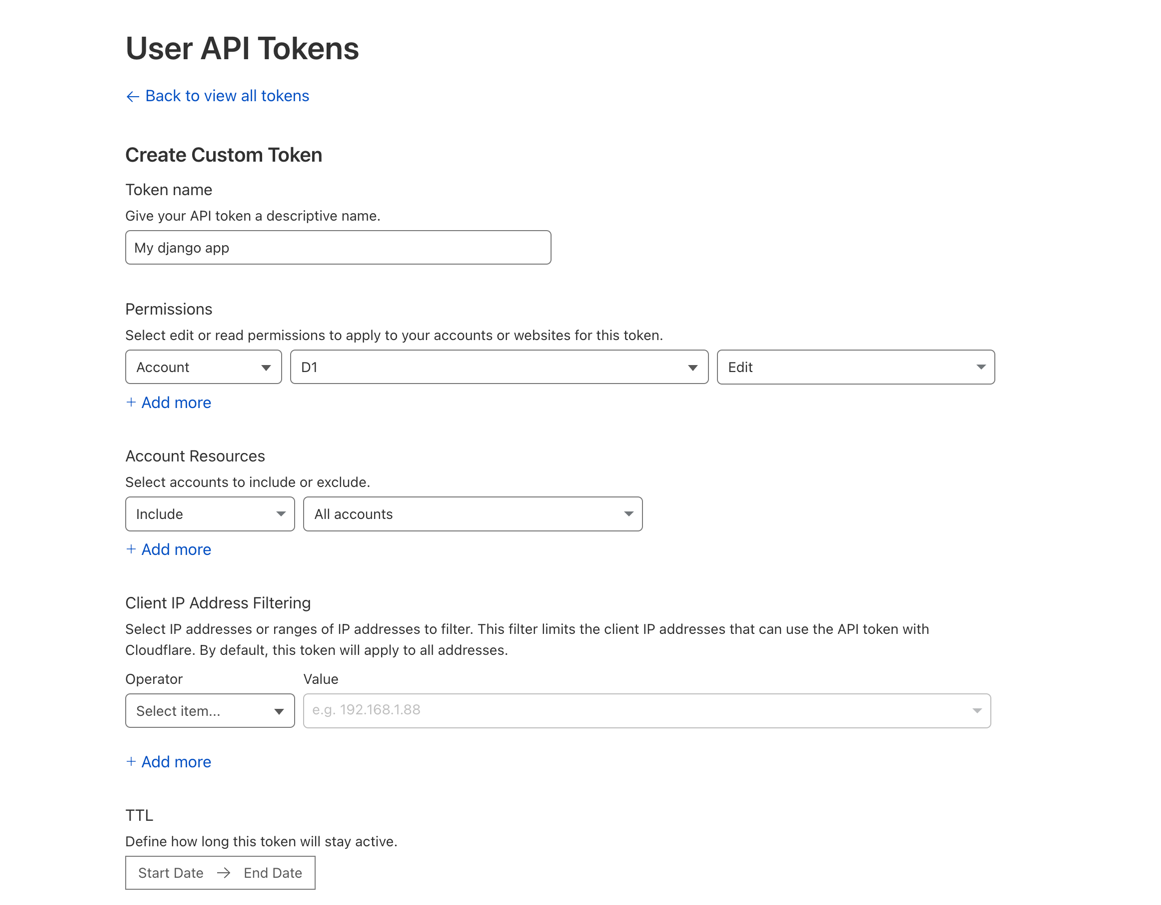
After this scroll down and click “Get started” on the “Create custom Token” option.
In the token name enter your django app name for better visibility and select the permission:
- “Account” -> “D1” -> “Edit”
You can leave the other fields in their default values, scroll down and click Continue to summary.
Then click “Create Token” then copy and save the new token in a safe place.
4. Updating the project settings
Open the settings.py file and scroll down until you find the DATABASES dictionary.
Update it to look like this:
DATABASES = {
    'default': {
        'ENGINE': 'django_d1',
        'CLOUDFLARE_DATABASE_ID': '<database_id>',
        'CLOUDFLARE_ACCOUNT_ID': '<account_id>',
        'CLOUDFLARE_TOKEN': '<token>',
    }
}
5. Final Result
From now on every SQL query you make in your django application will be executed on a D1 database.
You can now also apply the initial migrations required by django by running this command:
python manage.py migrate
This command will take a while to run, as your queries are now running on a remote server instead of your local instance.
You can inspect the django-cf code in the github repo.
Due to some constraints with the D1 api, that will be fixed soon, running queries is a bit slow. So its recommended users take a look a Durable Objects, this library also supports that, and you can learn more here.